1. Building and incubator is not very difficult if you have some basic carpentry and electrical skills. The next best thing is to marry someone who has a family member with these skills. If the family member will work for beer it is actually the preferred method.
2. Build a frame. Add outside walls and put on a door. Getting a good seal around the door and sealing all cracks is critical in keeping the humidity up and the temperature stable.
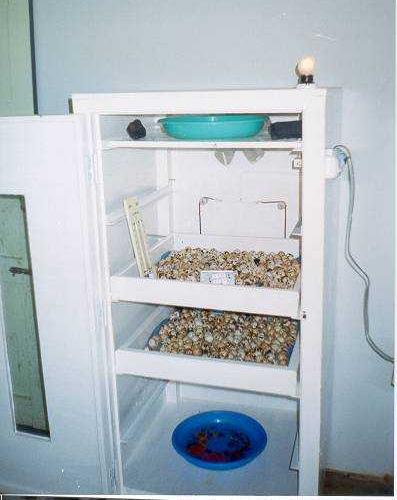
3. A glass window, which allows you to see all racks, is very helpful and will keep you from opening the door too often to see what is going on. Not opening the door very often will help keep the humidity up.
4. I could never get the 2 heating elements I ordered to work properly and had to get some from a heating and air conditioning repair place. I also got my fan there.
5. I got one set of thermostats (wafer type) from GQF and the other I bought locally. Both work ok. The one I bought locally had one switch and 2 wafers together and seems to be a little fore sensitive.
6. I had a wet/dry bulb thermometer in the window but I think it reads a little low and I prefer to have a couple of small holes in place and use a probe type thermometer to verify the temperature.
7. Once you figure out how much surface area you need on you water container to get the humidity correct all you have to do is keep it filled. I keep a misting bottle inside the incubator to mist waterfowl eggs and I squirt a wall once or twice if I have the door open more than a second or two. The temperature will go back to normal quickly if you have a full incubator, but it can take a while to get the humidity back up if you have the door open very long.
8. Size does matter. Build it larger than you need. There's very little difference in price of materials between a small and large incubator. I have no trouble incubating different eggs together. I do think that trying to hatch waterfowl and chickens or quail together is a problem because the humidity requirements are different. Locate your heating element a few inches away from the nearest egg rack. Leave room to get inside to clean everything easily.
9. Use a larger heating element than you need and it will use a little more power, but the temperature will be more constant and you can leave the vents open more.
10. Put a light on the inside with a switch on the outside. Place the light as far away from the thermostat as possible. If you accidentally leave the light on it can cause the thermostat to cut off and the temperature will drop.
11. I purchased an auto-turning device to attach to my egg racks but have not used it. I have a lever on the outside, which turns all the eggs at once. It has worked very well so far.
12. I live in the tropics so I don't have a lot of trouble keeping the temperature steady. When the outside temperature gets up over 95 degrees the heat from the fan motor can take the temperature on the inside up over 100 degrees.
13. Thoroughly paint the inside and out with enamel paint. Do not use a thinner in your paint or it will take along time to get the odor out.
14. In the photos the large black objects are pieces of homemade charcoal ,which help keep the odors down.
15. Put the legs of you incubator in bowls with water in them or treat the legs with an insecticide to keep ants out of your hatcher. Little ants can actually get inside the egg once the chick makes the first hole and can irritate the chick to the point that it stops trying to get out and dies.